Asp.net Step By Step Working with MVC3
Asp.net Step By Step Working with MVC 3:
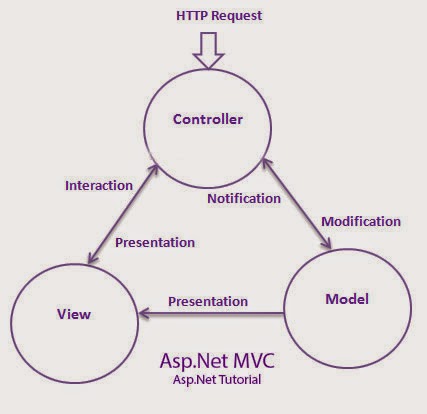
Step By Step Working with MVC:
Pre-requisite for MVC
Lab 1: Creating a simple Hello World ASP.NET MVC application
- Step 1: - Select the project template
- Step 2: - Select the appropriate ASP.NET One options
- Step 3: - Add Controller
- Step 4: - Add Views
- Step 5: - Connect the view to the controller
- Step 6: - Run the program
Beware of this common error:
Lab 2: Passing data between controllers and views
- Step 1: Create project and set view data
- Step 2: Display view data in the view
Lab 3: Creating a simple model using MVC
- Step 1: Create a simple class file
- Step 2: Define the controller with action
- Step 3: Create strongly typed view using the class
- Step 4: Run your application
Lab 4: Creating a simple MVC data entry screen
- Step 1: Creating your data entry ASPX page
- Step 2: Creating the controller
- Step 3: Create the view to display the customer object
- Step 4: Finally run the project
Lab 5: Using HTML Helper to create views faster
- Step 1: Create the Customer class
- Step 2: Creating the input HTML form using helper classes
- Step 3: Create a strongly typed view by using the customer class
- Step 4: Creating the controller class


Comments
Post a Comment